
With the number of solar panel installations in the United States exceeding five million (five times the number in 2016), it is clear that solar is the energy of the future.
One reason for its popularity as a renewable power source is its ease of installation.
If you want to go solar, all you need is a roof.
Want to know more? Let’s answer the question of how are solar panels installed on a roof, so you can get started and understand the entire process.
Step 1: Picking a Solar Panel Installer
The first and most crucial step in going solar is selecting the right installer. This decision will have a significant impact on the quality of your installation, system performance, and overall experience.
Here’s how to approach it:
- Research Local Installers: Start by researching reputable solar companies in your area. Choosing a local solar installer over a big solar energy company has many benefits, including less expense, better customer service, and stronger community knowledge.
- Get a Free Quote: Getting an estimate from a solar installation company will help you understand your costs and budget compared to your overall energy requirements.
- Ask About Experience: A solar panel installer should have both installation and electrical expertise as well as an understanding of local permit laws and solar incentive programs. Look at reviews and past projects to get an idea of their experience level.
Picking a solar energy company can be daunting, but when you use the tips above, then you will be able to weed out unreliable or overpriced companies to find the one that fits your needs.
Step 2: Site Assessment
Once you’ve chosen an installer, they will conduct a site assessment to evaluate your home’s solar potential. This assessment is critical in determining the optimal design and placement of your solar system.
They will inspect the following to create a customized solar plan for your home or business:
- Roof Condition: The installer will inspect your roof to ensure it is structurally sound and capable of supporting solar panels. If your roof is nearing the end of its life, you may need to replace it before installation.
- Sun Exposure: They will also assess the sun exposure on your roof, looking for any shading from trees or nearby buildings. The more direct sunlight your roof receives, the more efficient your solar panels will be.
- Electrical System Evaluation: It is important to hire a team with a master electrician because they will check your home’s electrical system. This procedure ensures it can handle the energy produced by solar panels. You may need an upgrade to your breaker box or wiring, depending on the age and capacity of your system.
During a site assessment, your installer will also be able to give you a rough estimate according to how many solar panels are needed for your home or business.
Step 3: Panel Orientation and Positioning
After the site assessment, the next step is to discuss the placement of your panels. This step is important to optimize the energy output of your system.
- Orientation: In most regions of the Northern Hemisphere, solar panels should face south to capture the maximum amount of sunlight throughout the day. However, east- or west-facing panels can also work well, depending on your location and energy needs. A solar panel installer will determine which orientation creates the most efficient energy absorption.
- Tilt Angle: The tilt angle of the panels is another essential part of solar efficiency. Installers typically set the panels at an angle equal to the latitude of your home, which allows them to capture the most sunlight year-round.
- Shading Considerations: During this phase, your installer will map out potential shading issues and recommend removing or trimming trees that may obstruct sunlight.
This step usually begins after you choose the installer and sign a contract.
Step 4: Choosing the Optimal Solar Panel Layout
Once orientation is determined, the installer will finalize the solar panel design layout. The goal is to maximize energy production while taking roof space and aesthetics into account.
- Maximizing Efficiency: The layout should ensure that panels are placed in the most sun-exposed areas of the roof, avoiding shaded spots that could reduce energy production.
- Aesthetic Considerations: Your installer will work with you to find a balance between performance and aesthetics. In some cases, homeowners prioritize hiding the panels from street view, while others prioritize energy output by maximizing coverage.
- Inverter and Battery Placement: The layout plan will also determine where the inverter and optional solar battery storage will be located. The inverter converts the DC electricity produced by your panels into usable AC power for your home. Backup batteries offer a surplus of energy during cloudy days or in case of potential power outages.
Your solar panel layout may also be determined based on your output requirements. For example, if you want 100% solar energy coverage for your home, then your roof will need more solar panels to increase its power output.
Step 5: Applying for Permits and Solar Incentives
Before installation can begin, your installer will need to obtain permits from local authorities and help you apply for available solar incentives. The permitting process ensures that your installation complies with building codes and electrical standards.
- Building Permits: Your installer will handle most of the paperwork for building permits. These permits ensure that the installation meets local safety and structural standards.
- Net Metering Application: If your utility offers net metering, your installer will apply for this as well. Net metering allows you to sell excess energy your system produces back to the grid, lowering your energy bills.
- Incentive Applications: Finally, the installer will help you apply for solar incentives like tax credits and rebates. For example, the Federal Solar Investment Tax Credit (ITC) allows you to deduct 30% of the installation costs from your federal taxes.
Some states, like Maryland’s solar incentives, also offer grants that reduce the upfront cost as well as tax exemptions and Solar Renewable Energy Certificates (SRECs) that help you earn back your initial investment.
Step 6: Installation Process
Solar panels, inverters, mounting hardware, and optional battery storage units will be ordered from the manufacturer and delivered either to your property or to your solar installers location. Once permits are approved, installation can begin.
The solar installation process involves:
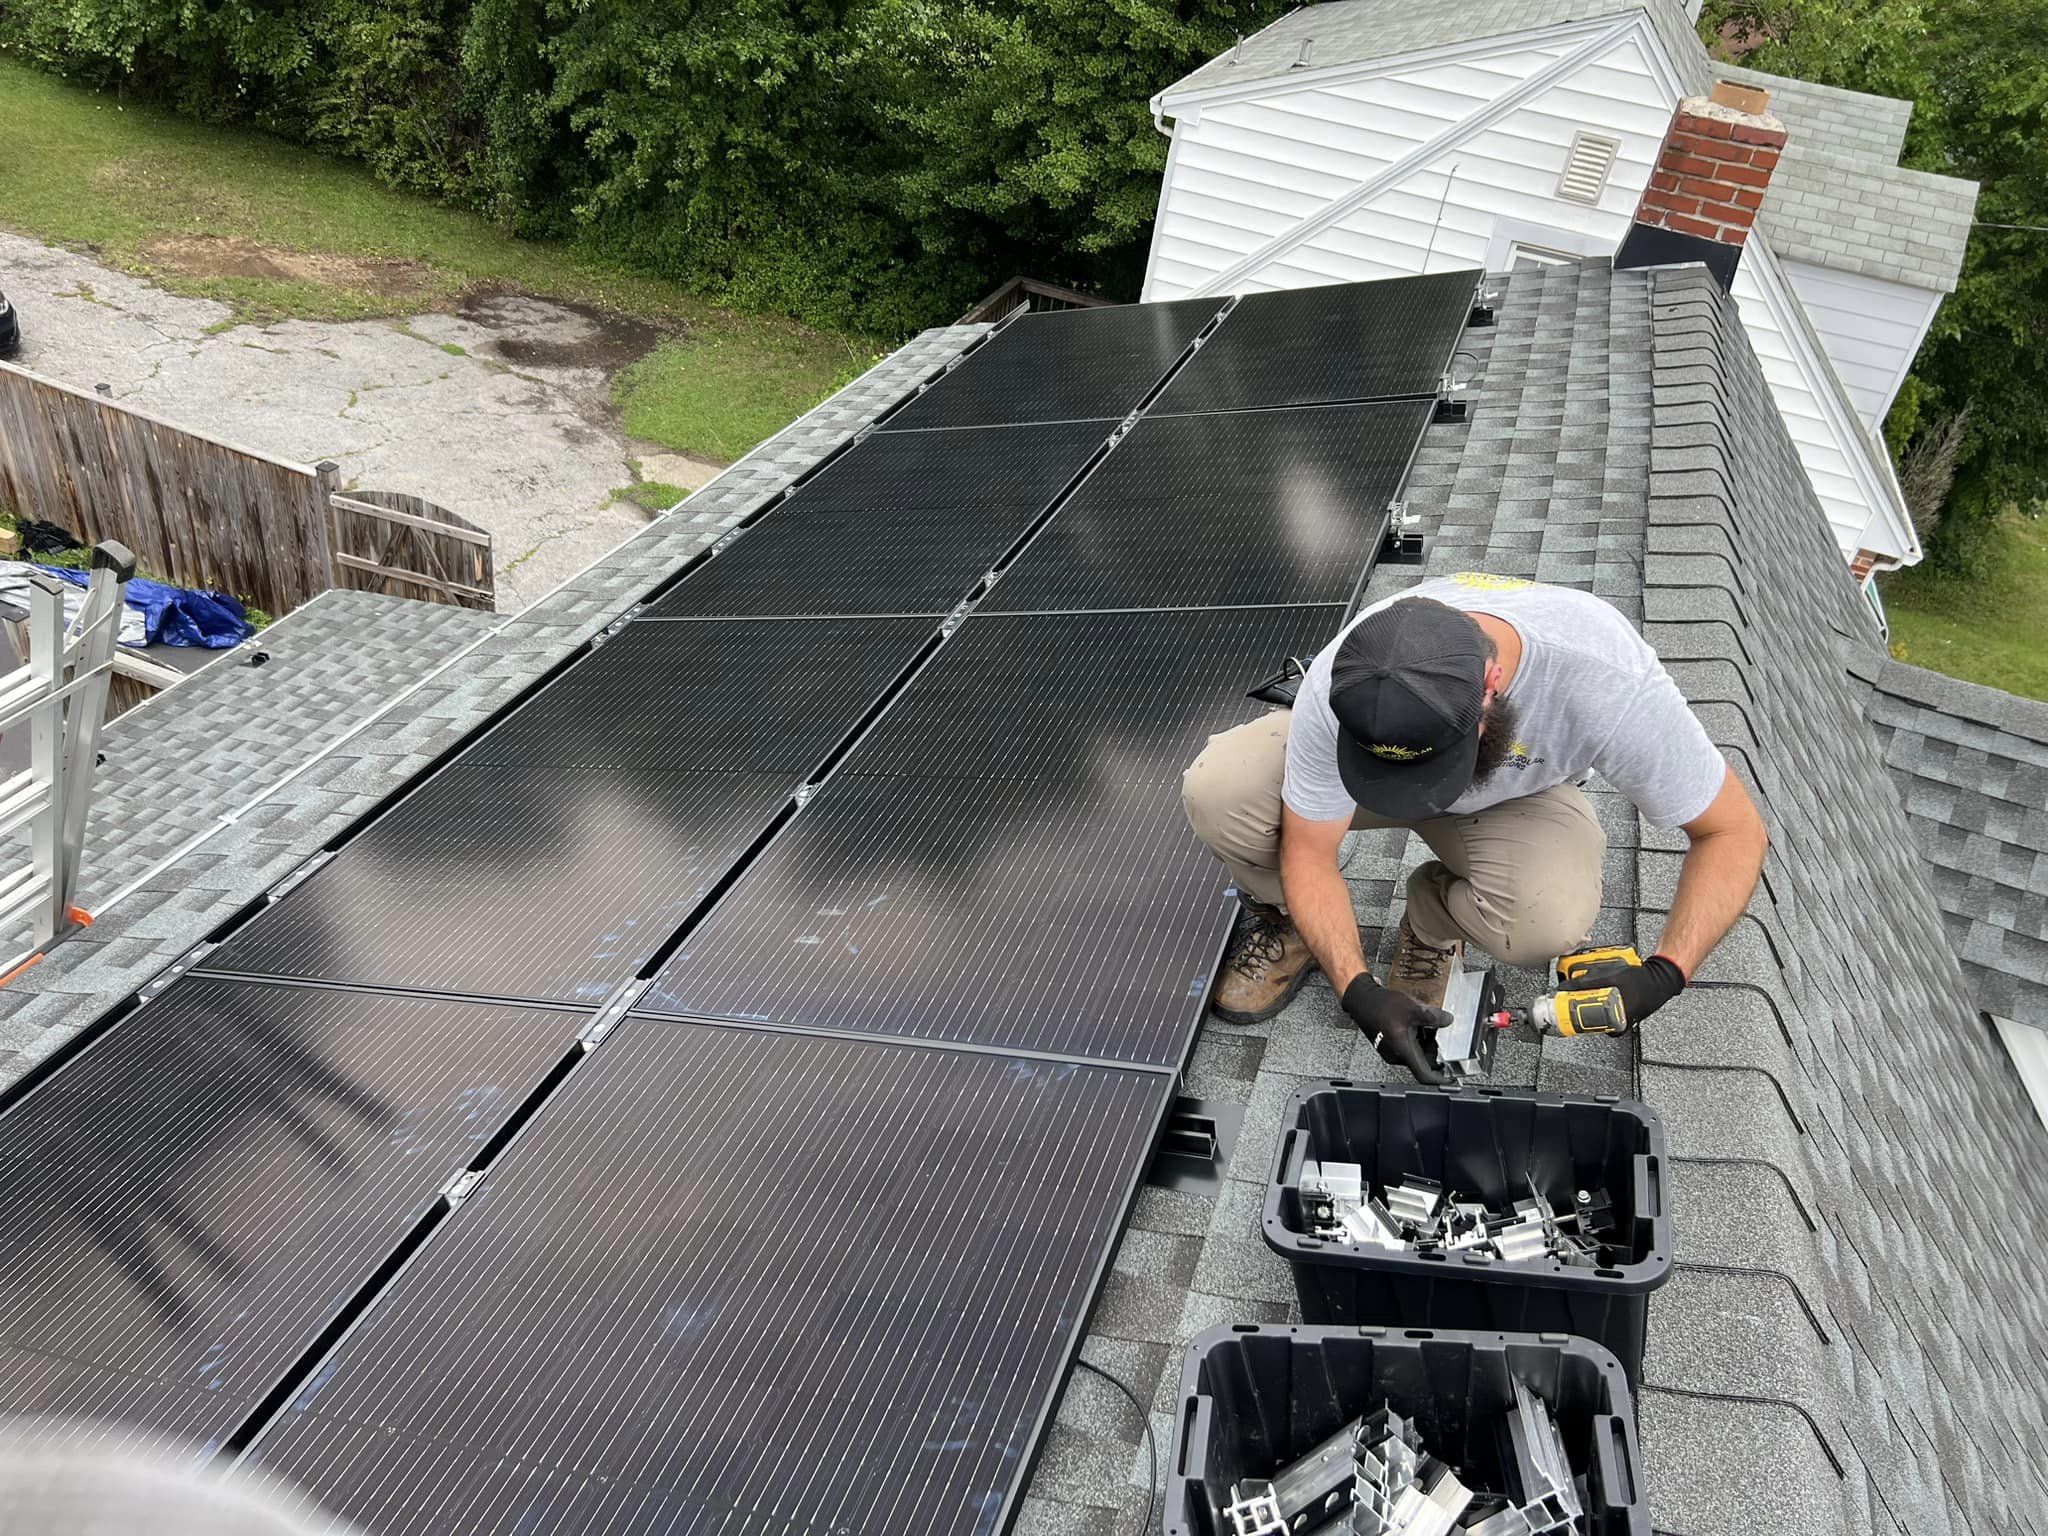
- Mounting the Racking System: The first step is installing the racking system, which will hold the solar panels in place. The racking is attached to your roof’s rafters with special brackets and bolts to ensure a secure fit.
- Installing the Panels: After the racking system is in place, the solar panels are mounted and secured. Each panel is connected to the racking system, ensuring they are positioned correctly for maximum sun exposure.
- Wiring and Inverter Installation: Once the panels are installed, the installer will connect the panels to the inverter. The inverter is the heart of the system, converting solar energy into electricity that can be used in your home. The wiring is then connected to your home’s electrical panel, where the energy can be distributed throughout your house.
- Testing the System: After installation, the installer will test the system to ensure it’s working properly. They’ll check the wiring, inverter, and panel connections to confirm that your system is generating electricity as expected.
A typical rooftop solar installation takes between one and three days, depending on the complexity of the system and the size of your roof.
Step 7: Maintenance and Warranty Coverage
After your solar panels are installed, ongoing maintenance is required to ensure the longevity and efficiency of your system. Solar panel maintenance is minimal, but there are a few tasks to keep in mind:
- Cleaning: Dirt, debris, and snow can accumulate on the panels and reduce efficiency. Regular cleaning or hiring a professional to clean the panels once a year can help maintain peak performance.
- Monitoring: Many solar systems come with monitoring software that allows you to track energy production and system performance. This will alert you to any issues, such as decreased output, that may indicate the need for repairs.
- Warranty Coverage: Solar panel warranties typically include both an installation warranty and a manufacturer warranty. An installation warranty guarantees proper installation, protecting you against improper mounting, faulty wiring, or roof punctures. The manufacturer’s warranty covers defects in the panels and other components.
Be sure to understand the warranty limitations and duration so that you know what is covered under your contract.
Why You Should Know How Solar Panels Are Installed on a Roof
Knowing how solar panels are installed on a roof can help you take the next step to go solar.
Before reading this article you may have wondered if your roof is right for solar panels. Now, you understand that a solar installer will assist with determining your roof’s condition and orientation as well as designing your solar panel layout and applying for permits.
The bottom line: when you choose an exceptional solar panel installer, you don’t have to worry about installation. They do it all for you!
All you need to do is contact Rising Sun Solar Solutions to let us know when to start.
